

 |
| WAU |
We'll kickstart the Imperial Guard review with our lovely leaders then...as we usually do. Imperial Guard HQs are interesting within the 5th edition construct in there are no FoC movers - something we've become very used to and really look out for. Not a huge biggie within the overall scheme of the codex with a bunch of options in every Force Organisation Chart slot but interesting none the less. Otherwise Imperial Guard HQs are all about supporting the little guys rather than being beastly themselves and should rarely be expensive. If your HQs are becoming expensive you're more than likely doing something wrong. Let's take a look then.
In this post I'll be looking at the Company Command squad and the every loyal Chimera. I know the Chimera isn't a HQ choice but we need to look at it at some point and the CCS has got a lot of entries to cover.
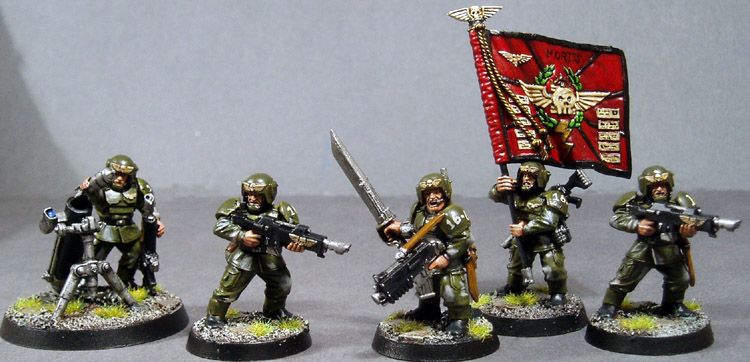
Company Command Squad
This is the most basic and commonly seen choice for Imperial Guard armies for a couple of reasons. It's cheap. It supports the whole army with orders. It supports the whole army with reserve manipulations. It can bring its very own Chimera. Winwinwinwin I think and it is still capable of bringing heavy and special weapons. Let's look at the orders first of which two can be 'cast' a turn.
Bring it Down! - Twin-linking weapons against a visible tank or monstrous creature. This is excellent for any unit with a bunch of heavy/special weapons in a given squad and helps overcome the BS3 the average Guard unit suffers from.
Fire on my Target! - Re-rolling successful cover saves against any unit is great. Mathematically there is no difference between this and Bring it Down! against vehicles/MCs though I would prefer Bring it Down! to ensure more hits. Fire on my Target! however has more application against non-vehicle/MC units and can really improve the ability of a given squad against infantry in cover.
Get Back in the Fight! - Any fleeing or 'pinned' target immediately gets up/turns around and is able to shoot and assault as normal. This is great for getting better cover saves on units without suffering from the drawbacks of going to ground (i.e. not being able to do anything next turn) - assuming you pass the Ld test of course. Less useful with fleeing units as they can rally normally but with units who normally couldn't rally due to enemy proximity or being below half strength, Get Back in the Fight! allows them to 'break the rules' so to speak. Very useful to have, particularly in objective games.
First Rank, FIRE! Second Rank, FIRE! - More lasgun shots doesn't sound that impressive but every wound caused is a wound which could fail. This allows Infantry units to increase their potential damage by roughly 33-50% depending whether or not they are in rapid fire range or not and is obviously very useful against closing infantry units. A combined Infantry squad or a couple of these squads can put out a lot of potential wounds so make use of this as enemy infantry get close.
Incoming! - +2 cover sounds great! but you have to forfeit that unit's shooting for that turn (remember how Orders go). That being said, combined with Get Back in the Fight!, Incoming! allows certain units (i.e. units on objectives, bubble-wrap units, etc.) to survive a great deal of incoming firepower. Considering the cost of most Guardsmen units, having a 2+ cover save is pretty damn annoying to your opponents. This is going to do nothing against weapons which ignore cover or assaults however and you're still T3 so don't look upon this combination as being invulnerable.
Move! Move! Move! - Roll three dice and pick the highest for your run move. This is great anytime you are fleeing something or running towards something. Having three chances at a six is great and makes the Run! move more reliable. How many times do you need just a couple of inches to get within an objective late game? Move! Move! Move! raises your chances of making those few inches.
Lot of different orders there with the main ones for the CCS being Bring it Down! and Fire on my Target! The others all have uses but these two orders really make groups of heavy weapons much better against mechanised targets - something very important in 5th edition.
The Company Command Squad also has a lot of options in regards to wargear; able to take up to four special weapons, a heavy weapon (including Heavy Flamer), Krak Grenades, Laspistols, Camo Cloaks, Carapace Armor, a Medi-pack, Regimental Standard, Vox-caster or any combination there-of. Most of these I would avoid as they are just packing on points to a unit you want to keep pretty cheap. Some good options however are the special and heavy weapons which allows the unit itself to impact the battlefield with weapons (i.e. meltaguns, lascannon), the Vox-caster for more reliable orders and the Regimental Standard for more reliable Leadership - important for low leadership armies. The real upgrades from the CCS however, are the advisors.
The bodyguards are obviously the worst of these which improve the survivability of your commander at 15 points each. Nice but not really necessary - he is cheap after all and whilst he does provide quite a bit for the army, he's not an essential piece which must stay alive. Master of the Ordnance is the next most useless which is basically a cheap Basilisk but unreliable. A S9 AP3 ordnance barrage is nothing to sneer at for 30 points but since it always scatters the full 2D6...well it's very unlikely to every hit anything. And then we get to the two Advisors worth talking about. Master of the Fleet and Astropath, both of whom impact upon reserves.
Master of the Fleet - The least useful of the two, Master of the Fleet impacts upon opponent reserves by forcing them to have a -1 modified to their rolls. This is a double-edged sword as a common tactic when going 2nd against Imperial Guard is to reserve deny. Whilst the -1 makes their army come on slower, there is a great chance the army could remain in-tact until later in the game and thus reduce the effectiveness of the Guard shooting. On the other hand, against an army which reserves only a couple of units, Master of the Fleet can delay when they come in and thus allow the Guard army to get an upper hand early in the game. Importantly against outflanking units however, the Master of the Fleet can force the opponent to re-roll the table edge. This makes Outflankers even more unreliable.
Astropath - Pretty much the Master of the Fleet in reverse and thus much better. Not only is reserving your army much more viable with an Astropath but your reserves come on sooner (sometimes a good thing, sometimes a bad thing) and you can re-roll your outflank rolls. Just having the option of going into reserve and most of your army or certain units (Vendettas, Manticores, etc.) coming in on a 3+ turn 2 is a great asset to have and well worth the 30 points.
The problem with both of these advisors is it is a flat +1, you don't get to choose if it's applied or not. This would have given them amazing tactical flexibility but either way, both have their uses as it stands.
And now we finally get to the best part of the CCS, the Chimera. Very few HQ options across all armies can take their very own dedicated transport and the CCS is the only one in the Imperial Guard codex which can. When you add in the large amount of mech commonly seen in Imperial Guard armies, the utility of the advisors, ability to take special and heavy weapons (at BS4 btw) and the army buffing abilities of orders, allowing the CCS to take its very own Chimera often makes the CCS a default choice for many Imperial Armies. Be careful on taking more than one though as their utility goes down (less impact from advisors as they do not stack, only so many units can make effective use of their orders) and they are still only five T3/5+ guys. Remember as well to watch the upgrades on them as they can get overly expensive quite quickly when they really don't need to be.
Chimera
And with that let's take a look at the workhorse of the Imperial Guard army - the Chimera. The first and really important aspect we need to look at in regards to the Chimera is its fire points. Imperial Guardsmen are notoriously weak and whilst you can get a lot of them since they are cheap, hiding in a transports means they are exposed to less firepower. Whilst they are obviously vulnerable to the transport exploding (~4-5 deaths), the odds of an explosion compared to the damage taken whilst afoot makes the Chimera a very safe place to be. The fire points are therefore very important as it allows units to fire not one but five weapons from the top-hatch. Not only this but orders can be issued from the Chimera, a restriction otherwise limiting for Company and Platoon Command squads.
With this in mind the Chimera is almost an obvious choice for nearly every unit which can take them and whilst not exactly cheap, 55 points isn't breaking the bank. What's great about the Chimera is it also brings two heavy weapon options to bear. The top turret has the option of the Multi-laser, Heavy Bolter and Heavy Flamer though you should never changes this from the standard Multi-laser. Whilst it has only an AP of six, the increased strength over the heavy bolter and strength/range over the Heavy Flamer makes it a very effective weapon for the Imperial Guard army as it can destroy armor up to AV11. When taken in multiples, this gives the IG army a lot of S6 firepower it would otherwise lack. The hull heavy weapon only has two options - the Heavy Bolter or the Heavy Flamer - both of which are viable depending upon the role the Chimera is taking. If the Chimera is unlikely to be moving forward the extra three shots at range are very helpful in dealing with infantry or light armor in combination with the multi-laser. If the Chimera is more aggressive/mid-field based, the Heavy Flamer as an anti-infantry deterrent is a much better option. The combination of the Multi-laser and Heavy Flamer also means the Chimera can always move at least 6" and have an effective gun to fire.
To cap it all off the Chimera has a front AV of 12. The more Chimeras you have the longer you can make this AV12 work effectively for your whole army. Unfortunately the Chimera does have very weak side and rear armor (10) so any army which is able to get around the Chimeras quickly will have a much better chance of destroying them. Maximising the AV12 front armor of Chimeras is an important part of playing Imperial Guard well as explained here. If you expose your side armor too often you'll find enemy's have a much easier time dealing with your army than usual so maximise that AV12 frontage!
All in all the Chimera is an excellent and cheap transport which brings both middling strength firepower, mobility and defense to an army which lacks these. Although very price effective, across an army they are going to chew up a lot of points so be careful of how many you take whilst not sacrificing the rest of your firepower.
Conclusion
Both the Company Command Squad and the Chimera are mainstays of most Imperial Guard armies. Although there are cheaper HQ options than the CCS as we'll find out next post, the CCS fits very well into the major paradigm of the Imperial Guard army thanks to their Advisors, Orders and ability to take a Chimera. The Chimera itself is the workhorse of most Imperial Guard armies and adds in some key elements most Imperial armies miss. At the same time they do chew up a lot of points and when they explode, take a lot of Guardsmen with them and are very vulnerable to being outflanked.
Next post we'll take a look at the other Imperial Guard HQ options before looking at the special characters.