


So this past Wednesday I ended up playing in an Apocalypse battle, arranged with one of my friends down at the local game store; it essentially boiled down to "Hey I have a company of Blood Angels, I hear you've got a lot of Tyranids. We should have them fight." I agreed, and we found some time for things between our schedules (he works early morning to evening, I work graveyards, store is open 11 AM to 6 PM, not exactly convenient.)
However, we managed to get things worked out and dragged things down there soon after the store opened up to start the battle. We both had a touch under nine thousand points- him something like 8.8K, mine around 8.5K; he was using the Masters of the Chapter and Battle Company formations, I used the Endless Swarm. Since he didn't have any superheavies, I declined to use my big beasties as gargantuan creatures, instead playing them as Mawlocs. Since I was a bit under on points, I got an extra stratagem as per the Apoc rules, which did a little bit to catch me up with his oddles of free choices from formations.
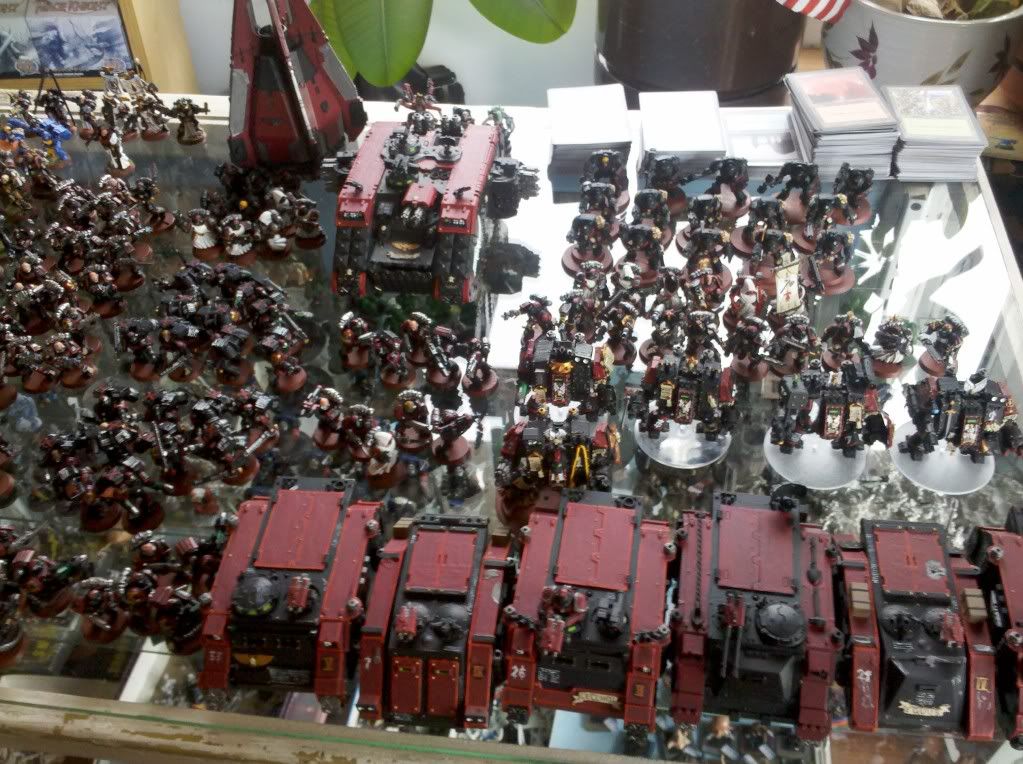

My friend was playing counts-as Blood Angels, which is to say he was playing Blood Angels, but using the vanilla Marine codex for all of his squads except one, a unit of ASM with a Priest attached. He was thankfully relatively light on vehicles- one Land Raider, one Vindicator, a pair of Predators (Tri-Las), a couple of Razorbacks (TLLas), and a few miscellaneous Rhinos. He has a metric crapton of Tactical squads, most all of them with a heavy weapon (Missile or Las) and Power Fist, a few Scouts with counts-as Telion, a Master of the Forge(!), Devastators, Honor Guard, Command Squad, Assault Squads... oh yes, and five Dreadnoughts and a Drop Pod. He also has a number of Librarians (three, I think) to make things difficult for my psykers.
On my side of things, we have a similar smattering of virtually every unit in the codex. My two Tyrannofexes and one winged Hive Tyrant are in the spawning pits for repairs and I just barely get my Swarmlord ready in time (pics of him later), but I still have plenty of MCs in the form of my other two Tyrants, Flappy and Walky, alongside three 'Fexes, two Tervigons, two Trygons, and two Mawlocs. Tyrant Guard (three and two) accompany the Swarmlord and Walky, for protection. Two dozen Warriors and a pair of Primes add to the heavy hitters, half of them in Boneswords/Claws setup and the rest using miscellaneous weapons. A brood of Lictors, two of Hive Guard, one of Zoeys, Deathleaper and the Doom, and two brood of Ymgarl 'Stealers mean that my elites slot is MORE than sufficiently filled. Troops come in the form of three full broods of Hormagaunts (one with Toxin/Adrenal, two naked) and three broods of Termagants (one of them still Spinegaunts, since I haven't gotten around to tearing them apart), two dozen Genestealers (one set with Broodlord), and twenty Gargoyles with the Parasite, plus four Biovores. Oh, and Spore Mines. So many Spore Mines- around fourty of them, ready to be DS'd in (we agreed that using their special deployment rules wouldn't make sense or be fun, so they could arrive like normal units from Strategic Reserve.)
We divide the table up by Apoc's wacky "roll a scatter die" method and end up with a split favoring my left table edge. I end up with first deployment and first turn. We have three objectives each, to be placed after deployment; I pick Flank March and Blind Barrage for my stratagems, hoping to use them to get into CC with "minimal" losses- in the scale of things, anyways. Terrain is a little on the sparse side, but not exceedingly so, and it's decent enough at midfield, which is where I really need to worry.
I lay down a carpet of Gaunts on the front line, with Genestealers and Gargoyles up the left edge, hoping to get in his grill early on and be inconvenient- I'm not really concerned with losses there, as Endless Swarm + Flank March means I can bring in my troops pretty much wherever I care to do so. My MCs take a bit of a backline approach, as I know he's going to be DSing in some strong assets and I expect him to do so behind me, as that's the only place there is any space available. Biovores deploy back a bit on the left side, ready to drop bombs, and Hive Guard take their place behind Head Hill (visible in the pics above near the center, a mannequin's head with flocking and paint) to get safe shots on any armor. Trygons, Mawlocs, and various "special" units (Ymgarl, Lictors, etc) start in reserve, ready to do their thing when they arrive.
He deploys in a pretty basic line across from me, all his vehicles clustered on (my) right flank and a line of Dreadnoughts on the left, near my Genestealers. Hrm. Some Devastators and a Libby, plus a Chapter Master, take position in the Fortress of Redemption we've dragged into the battle and do what Marines do, i.e. line up in ascending rank on a piece of area terrain. The remaining Devastators, along with all of the Combat Squads with a heavy weapon in them, hole up in a good-sized ruin near his back table edge to provide support. MotF hides inside his tank bubble and Scouts take position in a small ruin to snipe from. Drop Pod with Sternguard, five TH/SS termies, and ten normal Termies along with a couple ASM squads go into reserve to try and pull tricks on me. He also infiltrates a squad of CCW Scouts in behind me, aiming for a back objective.
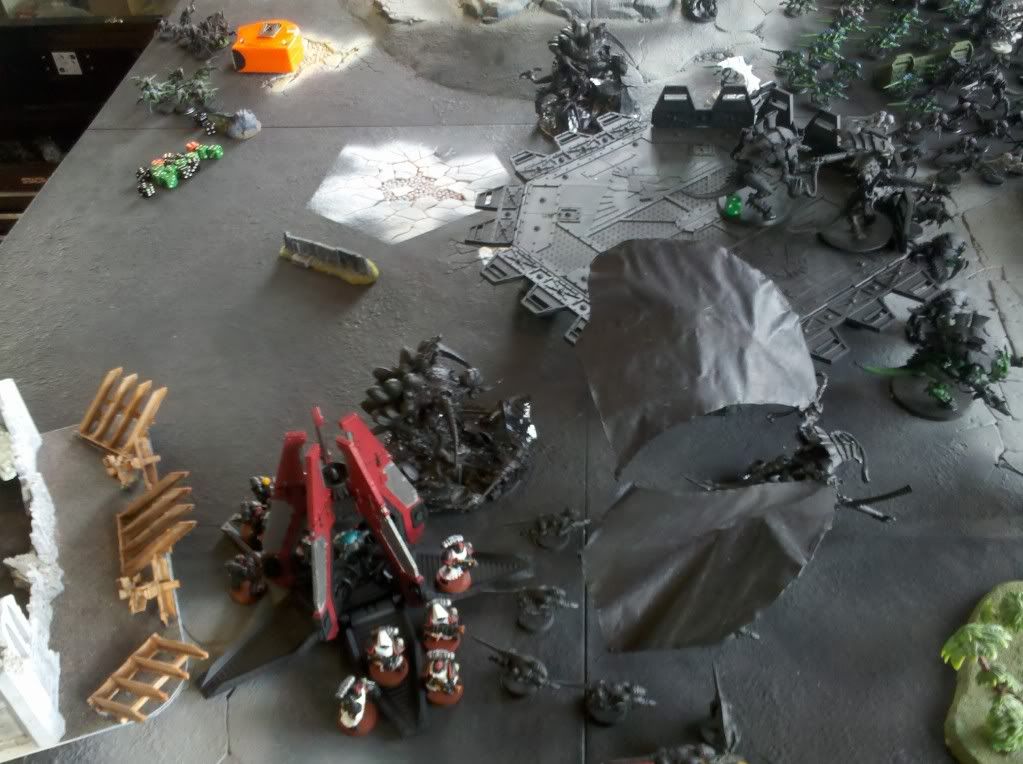
 Battlefield overview during deployment. Yes, that's my ugly ass on the left there. Note Head Hill in the center (everyone's favorite terrain) and my Flyrant's enormous fucking wings again, easily spanning half the width of the landing platform and then some. Fortress of Redemption is concealed behind me.
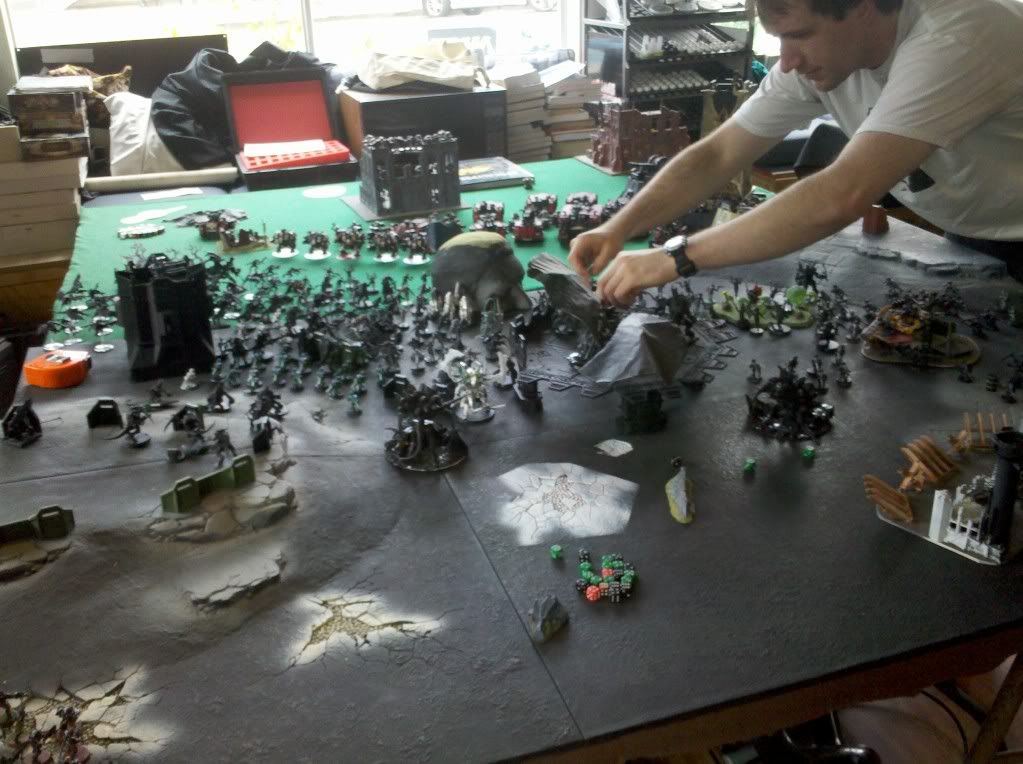
 Awfully blurry, but gives you some idea of the midfield. The markers by Head Hill and in the bottom right are my Blind Barrage.
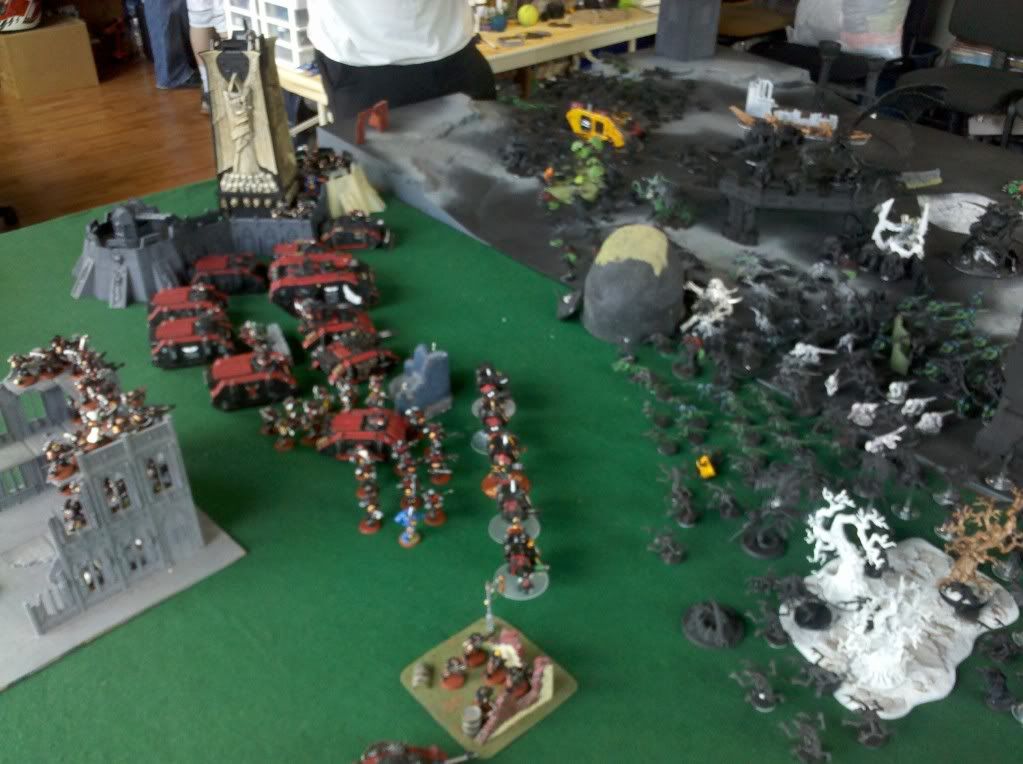
 Slightly better midfield shot. Fortress at the top is slowly being painted by our resident Good Artist.
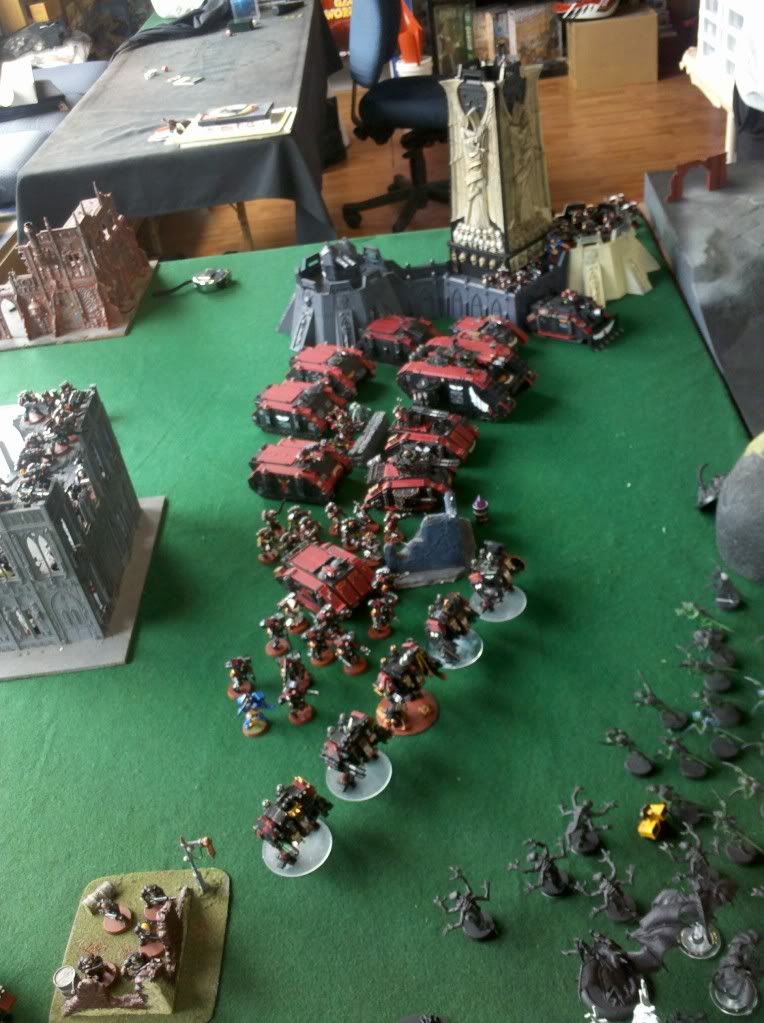
 Hey I hear Tyranids can field some dudes. Every Gaunt I had, no matter how poorly-built, half-painted, or missing limbs, was conscripted for this battle. My carapaces are actually much darker than it appears on the row of Termagants in the back, but the light catches the metallic color very strongly in this pic.
So, having the first turn, I drop my Blind Barrage, which scatters around a little bit but lands roughly where I want it on the left side. Hive Guard open up and set a pattern by failing to hurt the Dreadnoughts at all; I don't roll a single meaningful damage result on them the entire game. :\ Genestealers move forward along with the whole line sort of surging up just behind the barrage line, but some poor difficult terrain and run results mean I don't get off any assaults. (The "no man's land" in Apoc is only 12" across, so first-turn charges are quite possible. Venom Cannons and such shake his Vindi and a Predator, keeping the firepower output on that side of the table down. My MCs advance, but are well behind the Gaunt screens. My Swarmlord, who will not take part in the battle at all, rolling a '1' for every single time he runs and managing no more than 3" off any difficult terrain test. My Biovores turn themselves around, seeing the Scouts who are standing out in the open in my backlines, and rain explosive death down on them, wiping out 75% of the squad in one go. However, also setting the tone of the game, his dice refuse to fail him on Leadership tests and they remain rock-solid. (Seriously, I don't think he ever fails a Morale or Pinning test the whole game. It was crazy, even when I was beating him by 4-6 in combats.) As my turn is fairly uneventful, we pass over to him fairly quickly.
His Drop Pod and some ASM arrive, since he has Careful Planning; it's got a Locator Beacon on it, so I know where the Terminators are coming in next turn. Sternguard hop out and split into combat squads, ASM move forward but can't do anything this turn. Land Raider and a Rhino move up, the Raider disgorging a decked-out set of Vanguard Vets with a Chaplain and Captain with them; a Precision Strike gets declared on the Tervi next to the Sternguard, and they open up with combi-Meltas and Hellfire ammo, and it barely escapes with its life, taking five wounds straight up. Thankfull it is out of sight of his long-range shooting, which puts miscellaneous wounds on the 'Fexes, Tyrant Guard, etc, but nothing important. Lasers from space come down thanks to the Chapter Master sitting on the tower of the Fortress of Redemption, but thankfully a Guard is able to jump in the way of them and my Tyrant is okay. (Are those guys well-trained or what?) The heavy weapons in the large ruin are largely useless this turn thanks to Blind Barrage and the Dreads mostly lose their chance to shoot as well, although some are in range for assaults. :( One Ironclad manages to nick the edge of some Hormagaunts and will spend the rest of the game smashing 1-2 each turn while they scratch at it ineffectually, which I'm reasonably fine with; it's a pretty even trade of points if he can't go anywhere. Other Dreads engage my Genestealers and Gargoyles; rolling like absolute trash, I get perhaps six hits out of a dozen models (including my Broodlord and Parasite) and don't even get a single Rend against him, so they are unceremoniously swept off the table, with only one small squad of 'Stealers escaping the fray. The VV and his true Blood Angels squad on the right side of the table shred through a ton of Gaunts and my Primes, attached to the Hormies that get charged, are both quickly pulled in- something he doesn't realize until it's a bit too late. All in all, three of my Gaunt squads are wiped out (one Terma, two Horma) and ready to re-deploy.
3 pinkments:
sounds like your opponent didn't use his combat tactics very well, losing the combats he can fall back and blast you in most cases.
Also yeah Nids don't like D blasts very much (heirophant's don't mind tho!), good to have an apoc game with only codex units, swarms of guys, but it takes ages!
N00b marines, with tons of tacticals, versus experience tyranids. Round one! Fight! DRAW!
Nice report Puppy, huge pics for a huge battle!
The Swarmlord looks nice but agree re the arms being a bit big. Also not sure if the heading pointing down does the model justice. Looks like you've got a bit of 2nd, 3rd and recent bits in there though :P. A true Tyranid organism!
Post a Comment