


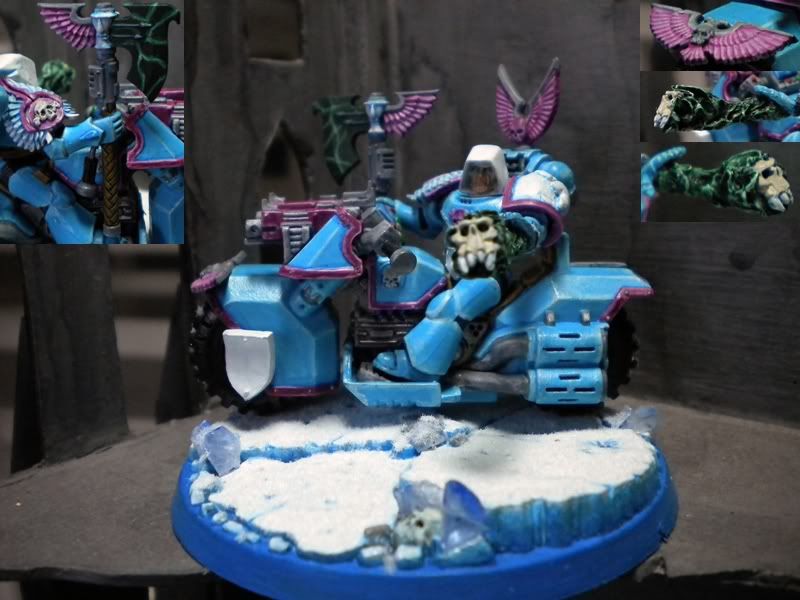
This ultimately gives the highlight and overall model a much smoother finish and look more 'natural', at least in my opinion of what pretty Marines and Eldar are going to look like before they head out to throw dice at each other =D. The end result of this technique looks like this on my models...
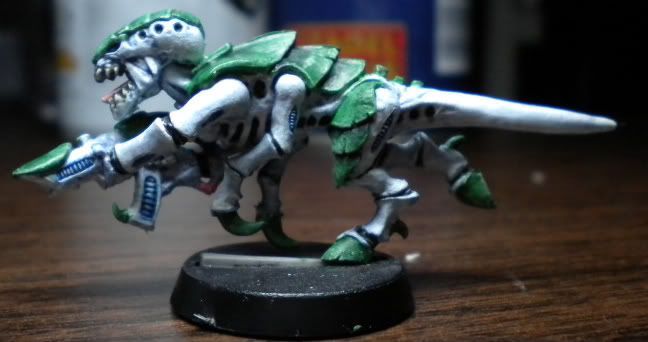
compared to a rougher highlight when done with drybrushing as seen on this Termagant...
How then is this technique achieved if it's something you are interested in? With painstaking time and a steady hand! Before you get started you'll need a few things which I'll list now.
- fine detail brush
- mixing pots
- a base color
- a contrasting/highlighting color
- a model
Not a lot needed but I cannot stress the importance of having a very fine brush and the mixing pot which you can use at a later time. How this works is pretty simple. You paint your model in the color you desire. In my Marines case this is Ice Blue. Once this is done you need to decide how many stages you want in the blend and what color you want to be used as your contrast. For highlights white is often used as it is an easy representation of 'use' but you can use whatever color you see fit. For infantry models I generally have 4-5 layers with a final highlight of pure white whilst vehicles or models with more space on them generally have more. This is to make the transition as smooth as possible whilst balancing the amount of work you need to do (compared to say 10-15 layers). You can of course do more or less layers as you see fit.
Once this has been decided you need to get your mixing pots out and prepare the different layers. This will make doing a whole army much easier and get a consistent look across all your models but not necessary. If you feel comfortable mixing on the go or are only doing a couple models with this technique it is not necessary to use the pots. Make sure your paint doesn't dry out though which the pots obviously help with. If you are using mixing pots however, prepare them before you start painting and make sure you label them (i.e. Stage 1, Stage 2, etc.). It makes life much easier and as said before, keeps the blending consistent throughout your army.
With my Space Marines I grabbed five pots and start off with a 5:1 ratio of base color to highlight color. With each layer I go up I add two parts of the highlight color. Important note here: because my base color was quite light originally, I needed those two parts of white in each stage otherwise it would have taken me many more layers to reach the appropriate highlight level I wanted. For a darker color such as black or purple, adding one part of the highlight color per stage will probably get a similar effect. Ultimately this up to the individual and how rapid you want the change to be. I find with my Eldar and Tau (who are brown and purple respectively) using one part per stage achieved a similar result to using two parts on my Marines with the lighter base color. Regardless of how you organise the stages, mix each stage before hand and clearly label them. This will give you each paint layer as you need it without having to mix on the go and leads to less paint wastage. If you're particularly ambitious you can use a single mixing pot and mix as you go and do the whole army at once (I did this with my Grey Knights). This saves on paint even more as there is less excess likely to be left over.
With the preparation over it's time to actually start the painting! Your first layer is very important as you don't want to cover too much area, otherwise the blending effect won't look very smooth but like a pixelated graphic. If you're only using a few layers this means you're initial layer needs to cover less space than if you were using more layers and the more layers you can fit into a smaller area, the finer the blend will be. From the initial layer, each layer needs to be just a little bit less in terms of coverage than the one before it until you get down to a very thin line of just the highlight color (aka a 'line' highlight). A graphical representation of this would look something like this...

Which translates to this in real life (the center area only)...

And then you're done! With that color at least. What I enjoy about this technique is it is really easy. It's time consuming but after just a couple of attempts, your models look fantastic both up close and from a distance. It's not as smooth as wet blending or an airbrush and as I've said many times, it takes a lot of time but is well worth the effort and is an excellent stepping stone for someone looking to upgrade their painting techniques (not that it is super advanced).
This technique also goes hand in hand with some basic shading and shadowing such as black-lining which results in the models having great depth and make the models 'pop' which is always important...
This technique also goes hand in hand with some basic shading and shadowing such as black-lining which results in the models having great depth and make the models 'pop' which is always important...
And with that!...*goes back to painting*...